

Window installation is a critical aspect of home improvement and construction that not only enhances the aesthetic appeal of a building but also contributes to energy efficiency, security, and comfort. This report provides an overview of the window installation process, types of windows, tools required, and best practices to ensure a successful installation.
Types of Windows
Before diving into the installation process, it is essential to understand the different types of windows available. The most common types include:
- Single-Hung Windows: These windows have a fixed upper sash and a movable lower sash that slides up and down. They are easy to operate and economical.
- Double-Hung Windows: Similar to single-hung windows, Double Glazing St Albans-hung windows have both sashes that can be opened. This allows for better ventilation and easier cleaning.
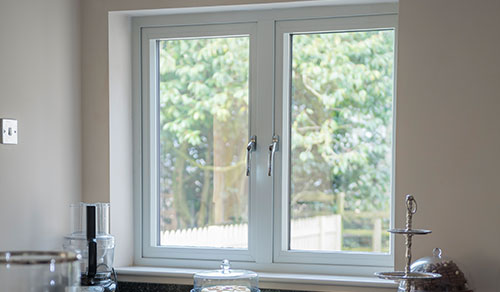
- Casement Windows: Hinged on one side, casement windows open outward, providing excellent ventilation and unobstructed views.
- Sliding Windows: These windows slide horizontally and are ideal for larger openings. They are easy to operate and provide a modern look.
- Bay and Bow Windows: These are multi-faceted windows that protrude from the home’s exterior, creating additional space and enhancing natural light.
- Picture Windows: Fixed windows that do not open, picture windows are designed to provide panoramic views and allow maximum light into the room.
Tools and Materials Required
Proper tools and materials are crucial for a successful window installation. Here’s a list of items typically needed:
- Tools:
- Level
- Screwdriver
- Hammer
- Utility knife
- Pry bar
- Caulking gun
- Drill
- Safety glasses and gloves
- Materials:
- Flashing tape
- Insulation (foam or fiberglass)
- Caulk (weather-resistant)
- Shims
- Screws and nails
The Installation Process
The window installation process can be broken down into several key steps:
1. Preparation
Before starting the installation, it is crucial to measure the existing window frame accurately. Measure the width and height at multiple points to ensure the new window will fit properly. Additionally, remove the old window carefully using a pry bar and screwdriver. Ensure to wear safety glasses to protect against glass shards.
2. Inspect the Opening
Once the old window is removed, inspect the opening for any damage, such as rot or mold. Repair any issues before proceeding. This may involve replacing damaged wood or adding additional support if necessary.
3. Install the New Window
- Dry Fit: Place the new window into the opening to check for fit. Use shims to adjust the window until it is level and plumb.
- Secure the Window: Once properly positioned, secure the window by fastening it to the frame with screws. Be careful not to overtighten, as this can warp the window frame.
- Insulation: After securing the window, fill any gaps between the window and the frame with insulation. This helps improve energy efficiency and prevents drafts.
4. Flashing
Install flashing tape around the perimeter of the window. This is essential for preventing water intrusion. The flashing should be installed in a shingle fashion, with the bottom piece overlapping the side pieces.
5. Caulking
Apply a bead of exterior-grade caulk around the edges of the window to seal any gaps. This step is crucial for preventing air and water leaks.
6. Interior Trim
Once the window is installed and sealed, install the interior trim. This may include casing, sills, and other decorative elements. Ensure that the trim is securely fastened and properly aligned.
7. Clean Up
After installation, clean the area thoroughly. Remove any debris, dust, or leftover materials. Ensure that the window is clean and free of fingerprints or smudges.
Best Practices
To ensure a successful window installation, consider the following best practices:
- Choose the Right Windows: Select windows that are appropriate for your climate and meet your aesthetic preferences. Energy-efficient windows can significantly reduce heating and cooling costs.
- Follow Manufacturer Instructions: Each window may have specific installation guidelines. Always refer to the manufacturer’s instructions for the best results.
- Work with a Partner: Window installation can be cumbersome, especially with larger windows. Having a partner can help manage the weight and ensure accurate positioning.
- Check Local Building Codes: Before starting the installation, check local building codes to ensure compliance. This may include permits or specific installation requirements.
- Consider Professional Help: If you are unsure about your ability to install windows yourself, consider hiring a professional. Proper installation is crucial for performance and longevity.
Conclusion
Window installation is a significant investment that can enhance the functionality and appearance of a home. By understanding the types of windows available, preparing adequately, and following best practices, homeowners can achieve a successful window installation that will provide lasting benefits. Whether opting for a DIY approach or hiring a professional, careful planning and execution are key to achieving optimal results in window installation.